SQL Essentials Training & Certification
- 11k Enrolled Learners
- Weekend/Weekday
- Self Paced
The previous blog on MySQL Tutorial mainly focused on the various commands and concepts related to SQL. In this blog on MySQL Workbench Tutorial, you will learn the tool for MySQL to perform various operations.
The following topics will be covered along this blog:
MySQL is an open-source relational database management system, which works on many platforms. It provides multi-user access to support many storage engines.
MySQL has various features that enable us to do many tasks such as comprehensive application development, providing availability and scalability.
Now, obviously, when you work at an industry level, you can’t do everything on the terminal right? You need some kind of dashboard which makes it easy for you to work with large databases and create models.
Well, the dashboard that can perform these actions is the MySQL Workbench.
MySQL Workbench is a designing or a graphical tool, which is used for working with MySQL servers and databases. This tool compatible with the older server 5.x versions and does not support the 4.x server versions.
The functionalities of MySQL Workbench are as follows:
Now that you know about MySQL Workbench, let me next tell you the basic requirements and the steps to install MySQL Workbench.
The basic system requirements to install MySQL Workbench is you should have MySQL installed on your system.
Now, since MySQL Workbench is available for many operating systems. Each of these systems, have their own basic requirement that you can refer from here.
Apart from this, to download the MySQL Workbench, you have to click on the Downloads tab and then choose the edition that you want to download.

So, for example, if you want to download the Community edition of Workbench on Windows, you can refer to the link here.
Now, that you know how to install, let me tell you the editions of MySQL Workbench Editions.
MySQL Workbench is mainly available in three editions:
| Features | Community Edition | Standard Edition | Enterprise Edition |
| Visual SQL Development | Yes | Yes | Yes |
| Visual Database Administration | Yes | Yes | Yes |
| Performance Tuning | Yes | Yes | Yes |
| User and Session Management | Yes | Yes | Yes |
| Connection Management | Yes | Yes | Yes |
| Object Management | Yes | Yes | Yes |
| Data Management | Yes | Yes | Yes |
| Visual Data Modeling | Yes | Yes | Yes |
| Reverse Engineering | Yes | Yes | Yes |
| Forward Engineering | Yes | Yes | Yes |
| Schema Synchronization | Yes | Yes | Yes |
| Schema & Model Validation 1 | No | Yes | Yes |
| DBDoc 1 | No | Yes | Yes |
| GUI for MySQL Enterprise Backup 1 | No | No | Yes |
| GUI for MySQL Enterprise Audit 1 | No | No | Yes |
| GUI for MySQL Enterprise Firewall 1 | No | Yes | Yes |
| Scripting & Plugins | Yes | Yes | Yes |
| Database Migration | Yes | Yes | Yes |
Now, once you download and install MySQL Workbench, you will see the following screen i.e. the home tab.
 On the left side of the Home tab, you see 3 different icons right?
Well, these are the mainly the 3 modules:
Now, before you get into these modules, to use their functionalities. You have to first start by creating a connection.
Now, to create a connection you have to click on the plus sign that you see on the home tab that you see.

Once you click on that, you will see this dialog box, wherein you have to mention the connection name, connection method and other details that you can see in the dialog box. After you mention the details, just click on OK.

Once you click on OK, you will see that your connection has been created.
Now, let’s continue our discussion by getting into the SQL Editor.
The SQL Editor is used consist of a set of specialized set of editors such as query, schema, and table. Apart from this, the editor also consists of four panes that you can see on the screen.

So, the queries and the panes together let you create and edit data, perform basic administrative tasks, view and export results, and run queries.
Now, let’s look into the administrative tasks section.
Under this section, you will be going through the following sections:
This tab gives you an immediate view into the basic health indicators and counters for your MySQL environment. As you can see in the below snapshot, this tab includes the view of the server’s running rate, available features, server directories and security settings for authentication and SSL.

This tab provides a list of all users and privileges who relate to an active MySQL server instance. So, with this tab, you can add and manage user accounts, adjust privileges, and expire passwords. Refer to the snapshot below.

There are majorly three ways to export and import data in MySQL Workbench which you can go through the below table.
| GUI Location | Data Set | Export Types | Import Types |
| Result Grid menu under the SQL editor | The result set (after performing an SQL query) | CSV, HTML, JSON, SQL, XML, Excel XML, TXT | CSV |
| Object Browser context menu | Tables | JSON, CSV | JSON, CSV |
| Management Navigator | Databases and/or Tables | SQL | SQL |
| Management Navigator | Databases and/or Tables | SQL | SQL |
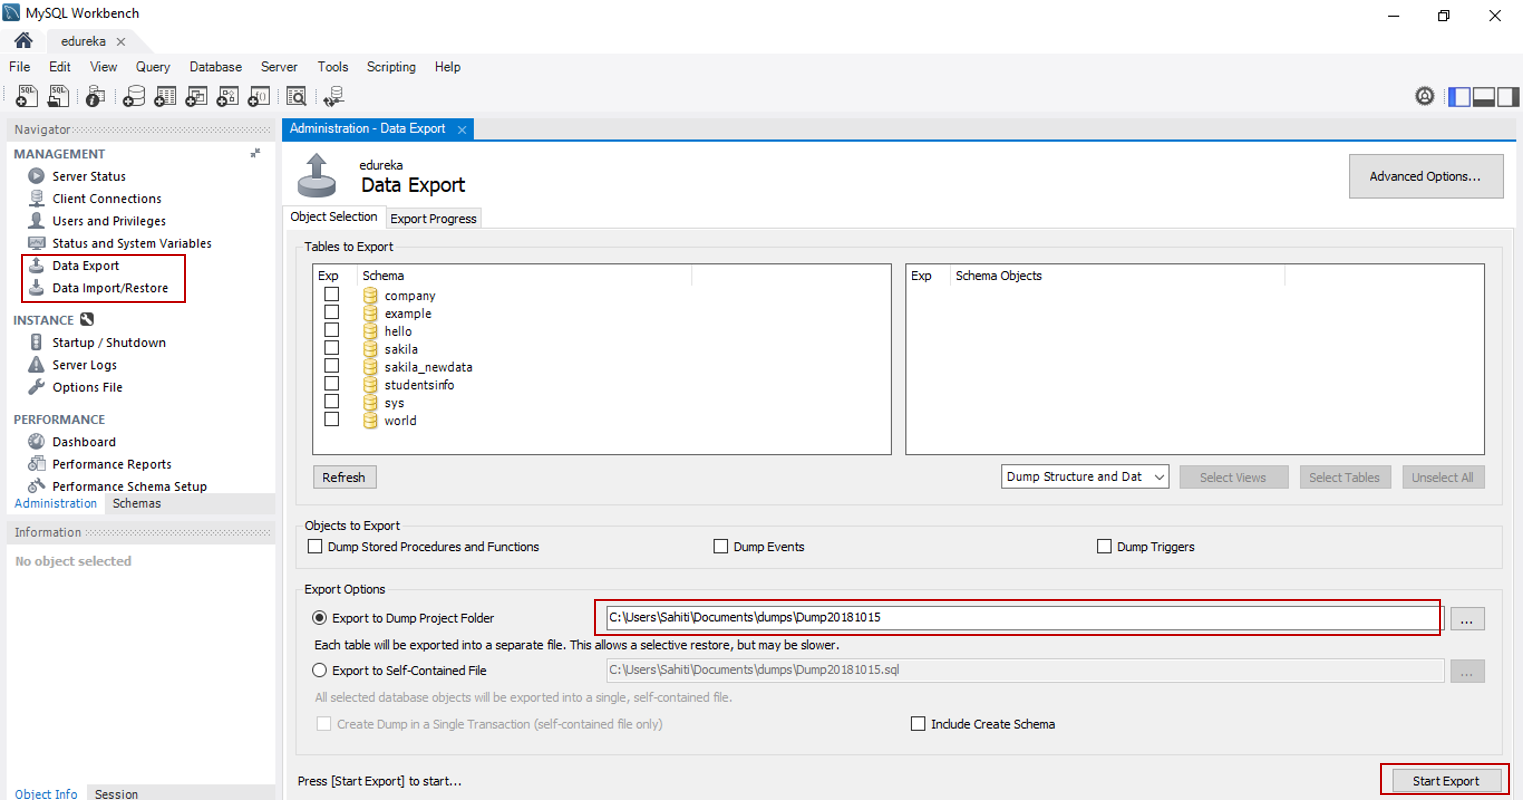
Now, to export/ import data, you have to choose the option of Data Export / Data Import from the Navigator Pane.
After you choose the option, you have to mention the path name of the folder from/to which you want to import/export. Refer to the snapshot below.

The commercial releases of MySQL Workbench enable us to use a MySQL Enterprise Backup (MEB) functionality so that we can safeguard the data from any loss.
There are mainly two MySQL Enterprise Backup operations available from MySQL Workbench:
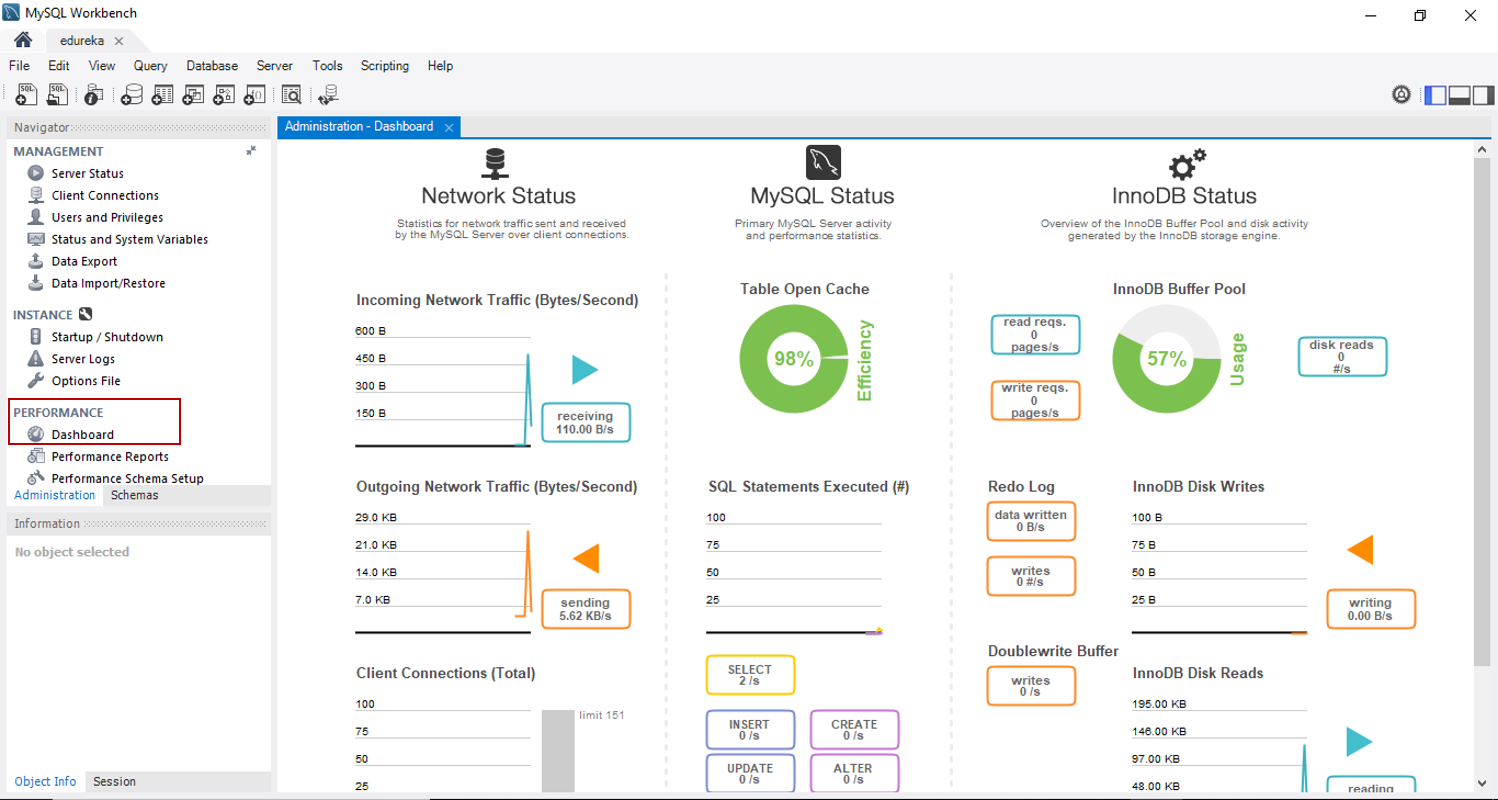
The Performance Dashboard of MySQL Workbench gives you a statistical view of the server performance. To open the dashboard, go to the Navigator Pane and under the Performance section choose Dashboard. Refer to the snapshot below.

Apart from this, the performance section enables you to provide insight into the MySQL server operations through Performance Schema Reports and also lets you see the key statistics of Queries executed through Query Statistics.
Database design enables you to visualize requirements and resolve design issues. This enables you to create valid and well-performing databases while providing the flexibility to respond to evolving data requirements.
As you can see in the below snapshot, you mainly have 3 options.

From the left side, the plus sign lets you add a new EER Diagram. The folder sign allows you to add saved EER models, on your PC to base the Workbench. The arrow sign that you see, lets you either create an EER Model from Database or EER Model from a Script.
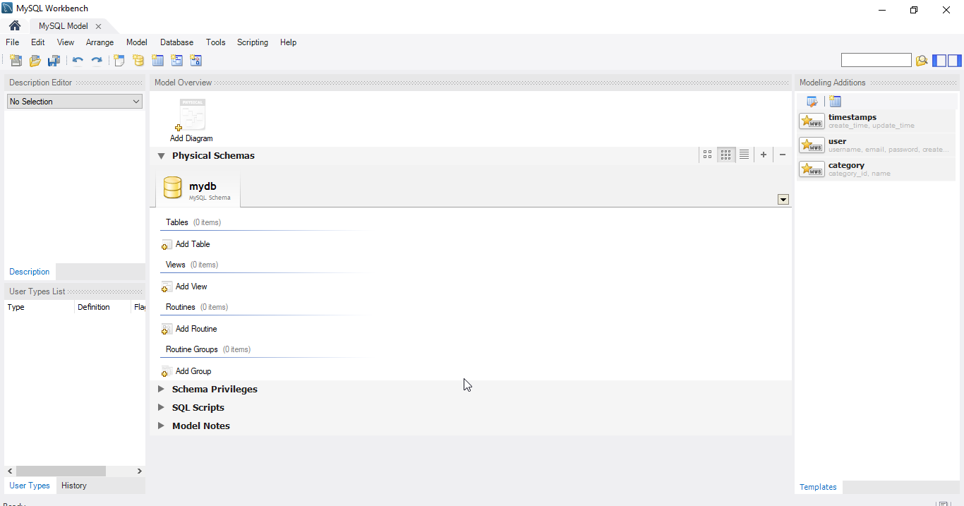
The below snapshot is the basic view MySQL Workbench.

In the database modeling, you can create an EER diagram using the model editor. So, you can add a table, add a view, add a routine, edit the data in the table, highlight a specific part of the model.
Well, guys, this is not an end to the functionalities, I leave the rest of them so that you explore.
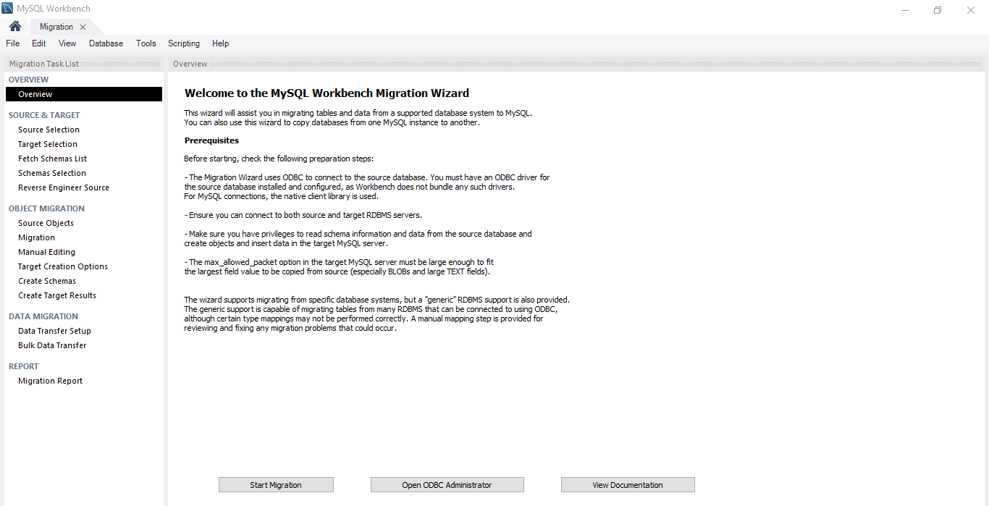
The MySQL Workbench provides the ability to migrate ODBC-compliant databases to MySQL. It allows you to migrate to different database types, including MySQL, across servers. It also enables to convert tables and copy data, but will not convert stored procedures, views, or triggers.
Apart from working on many platforms, the migration allows customization and editing during the migration process.

The following are the steps performed by Migration Wizard while migrating a database to MySQL:
Provides an extension system that enables the developer to extend MySQL Workbench capabilities. It also provides access to a cross-platform GUI library, MForms, and enables the creation of extensions that feature a graphical user interface.
The advanced features of Workbench enable the following capabilities:
So, that’s an end to this blog!
I hope you enjoyed reading this blog on MySQL Workbench Tutorial blog. We have seen the various functionalities and features of MySQL Workbench.
If you wish to learn more about MySQL and get to know this open source relational database, then check out our MySQL DBA Certification Training which comes with instructor-led live training and real-life project experience. This training will help you understand MySQL in depth and help you achieve mastery over the subject.
Got a question for us? Please mention it in the comments section of ”MySQL Workbench Tutorial” and I will get back to you.
 REGISTER FOR FREE WEBINAR
  Thank you for registering Join Edureka Meetup community for 100+ Free Webinars each month JOIN MEETUP GROUP
edureka.co
